
1. Download the geteduroam app
Download the geteduroam app from the App Store.
2. Open the app and find your organisation
Open the app.
Search for your organisation and select it from the list.

3. Choose your profile (if asked)
If prompted, select the profile you normally use or which is most appropriate (for example, staff or student). Click Connect.
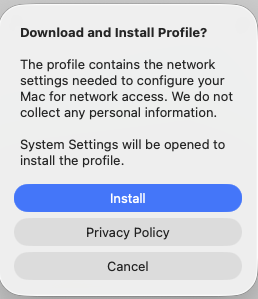
4. Confirm installer prompt
When prompted to download and install a profile, click Install.
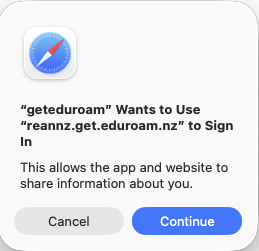
5. Click Continue
When prompted to sign in, click Continue.
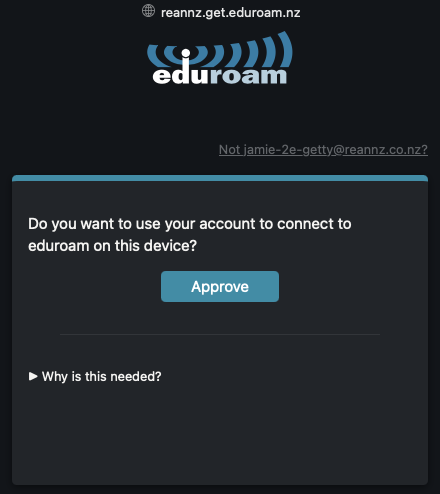
6. Approve the download of your profile
When prompted, click Approve to download your profile.
7. Open system settings
Open System Settings.
Select General, then Device Management.
8. Remove any existing eduroam profile (if present)
If an eduroam profile already exists:
-
Select the profile
-
Click the - button
-
Select Remove
9. Add the new profile
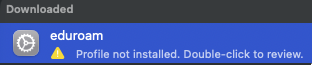
Double-click the downloaded profile to review.
After reviewing, click Install.
10. Install the profile
The following steps may require an administrator’s name and password to perform.
When prompted, review the profile. To ensure you are connecting to eduroam, ensure that the setting Wi-Fi Networks → Network says exactly eduroam in all lower-case.
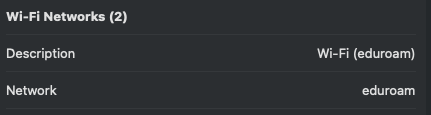
After reviewing, click Install.
When asked are you sure, click Install.
.png?cb=6b7c01c45226b93a0050f0090fcf10d4)
11. Confirm the profile is installed
You should see eduroam listed in Device Management.
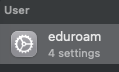
12. Connect to eduroam
Select the eduroam Wi‑Fi network.
Your device will connect automatically.
13. Confirm you are connected
You are connected when eduroam shows as the active Wi‑Fi network.